Show Only Selected Variant Images - Shopify Product Page Slider
This is a relatively unknown but truly powerful feature that lets you customize which variant images of your products get displayed based on the product variant chosen. Essentially, it eliminates redundant product images, making your store’s UX cleaner and more streamlined. From a customer’s perspective, navigating a gallery with minimal, relevant images significantly improves the shopping experience and reduces shopping time.
The Default Shopify Product Page Behavior
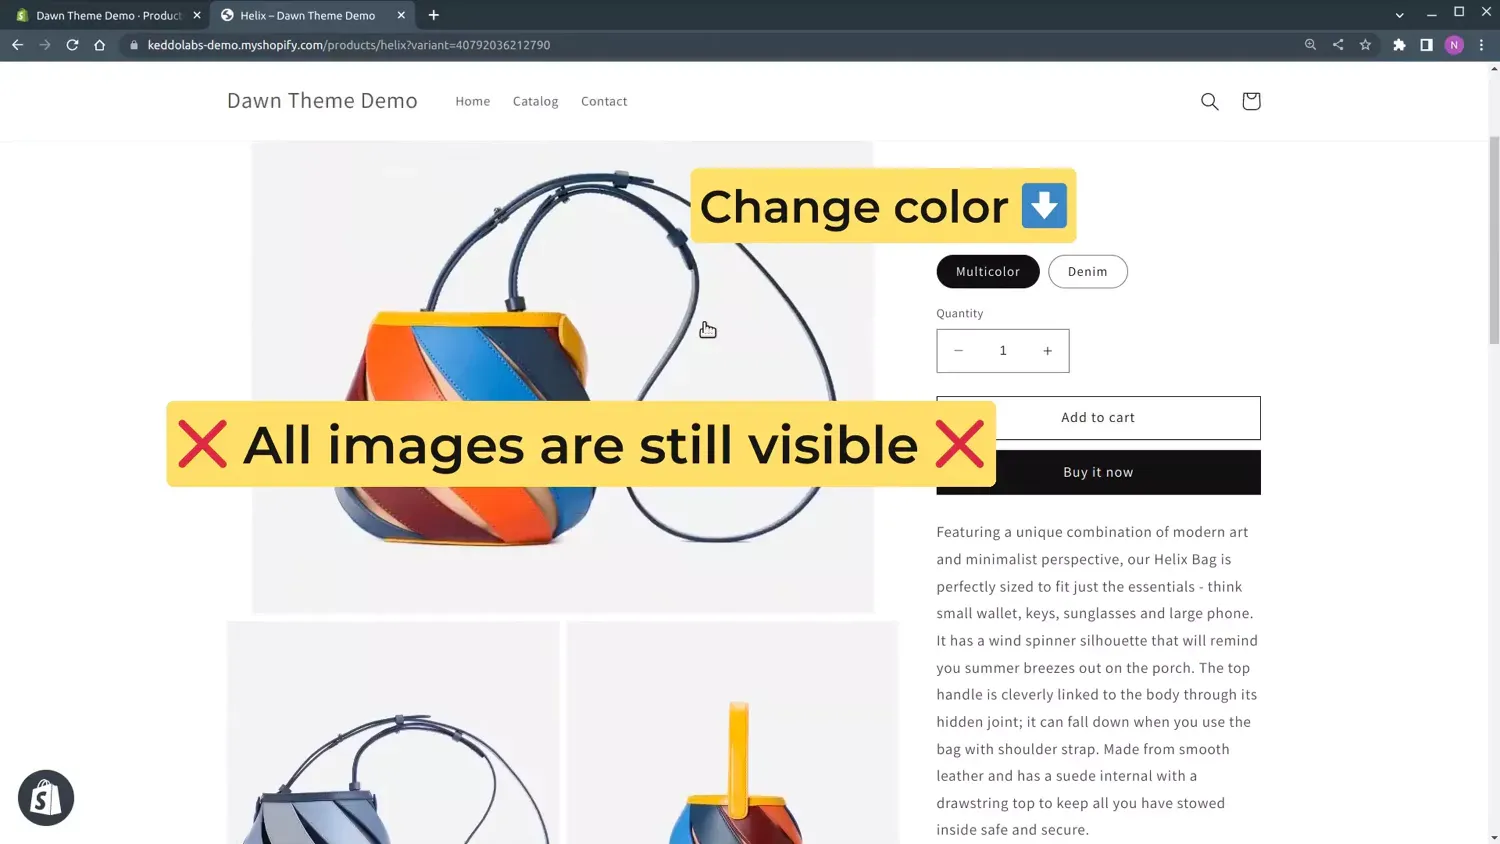
By default, Shopify will display all the images of your product, irrespective of the product variant selected. If you switch the variant from one color to another, you’ll notice that there’s no change in the displayed images. For instance, for a shirt with denim and multicolor variants, whenever you switch to the “Multicolor” variant, you still see all the images of the denim shirt littering your storefront.
Most Shopify Themes simply show all Images of a Product and “scroll” to the Featured Image when a Variant changed:
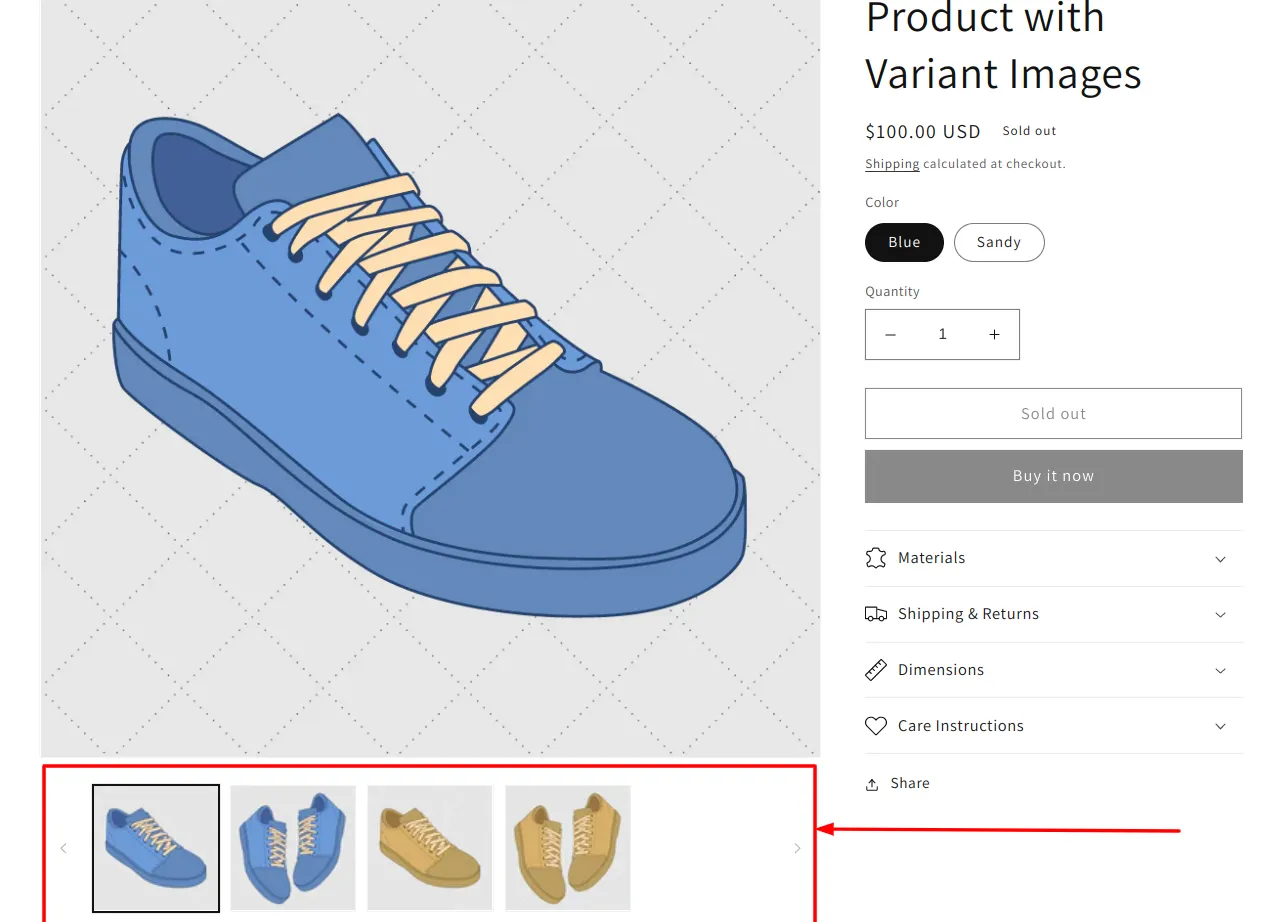
With the help of our Product Page Slider App you will be able to assign multiple Images to a Variant and only show relevant Images for each Variant. For example, if “Blue” Variant is selected — only blue Images will be visible:
Demo Product
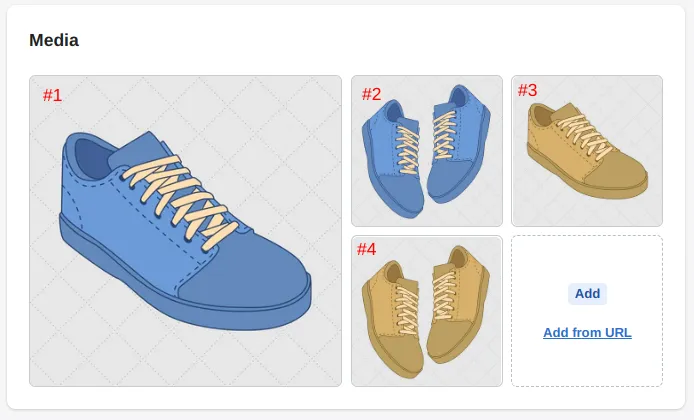
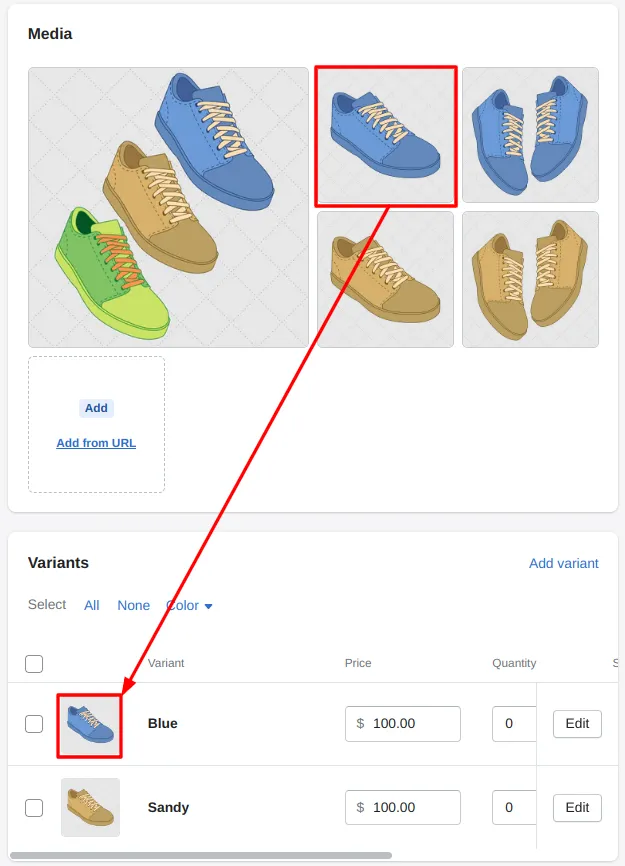
In this guide we are going to work on a simple Product that has 4 Images:
and 2 variants:
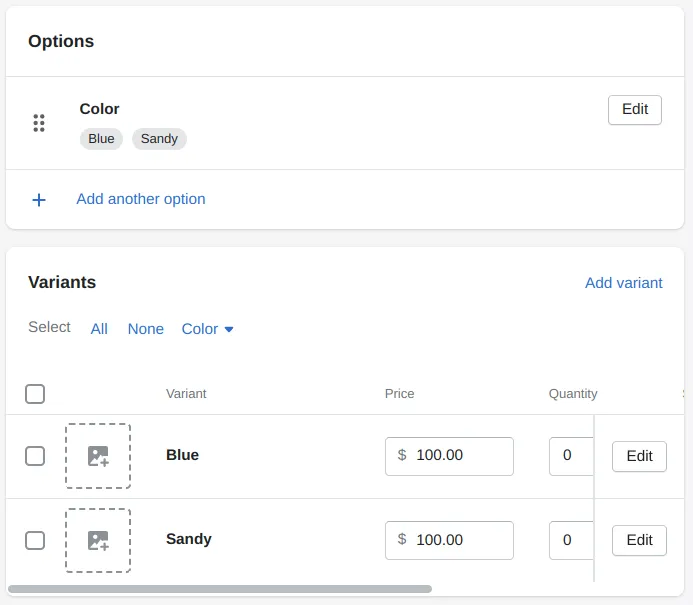
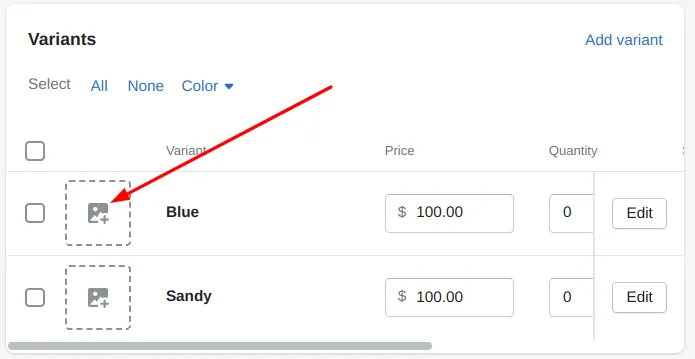
By default Shopify does not allow assigning multiple Images to a Variant. You can only select one Featured Image for each Variant:
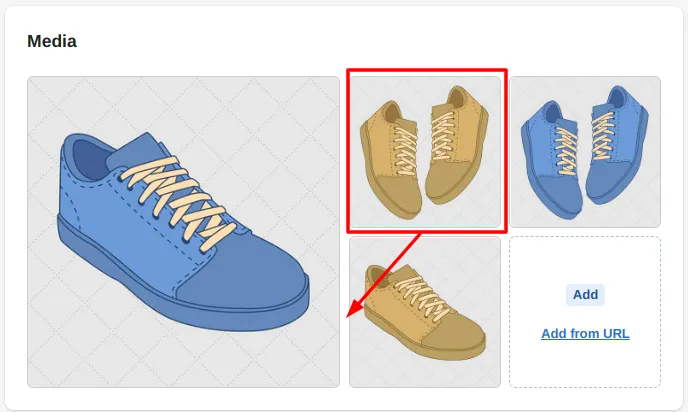
Step 1: Order your Images
It is very important to keep your Images organized especially when dealing with numerous Variants. For our App to work properly it’s required to not mix Images of different Variants.
What it means for our Demo Product is that all Images of the “Blue” Variant go first and then followed by all “Sandy” Images. For example, having one “Sandy” Image in between of two “Blue” Images is not valid.
You can always reorder Images in the Product Settings page by drag & dropping them:
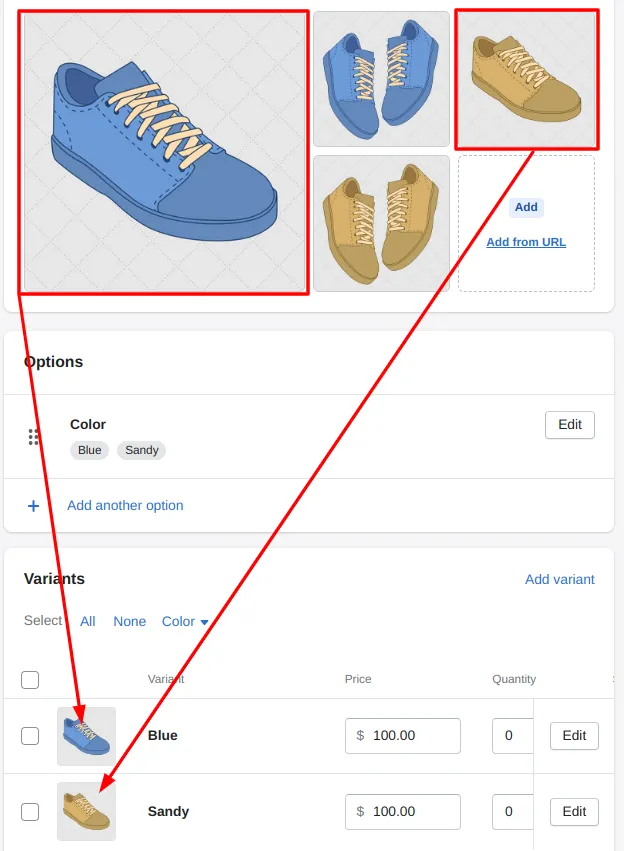
Step 2: Assign Featured Image to Variants
Now you should assign the very first Image of each Variant to its Featured Image. Arrange the order of images such that similar variant images are grouped together, and ensure other variant images are also in the right order.
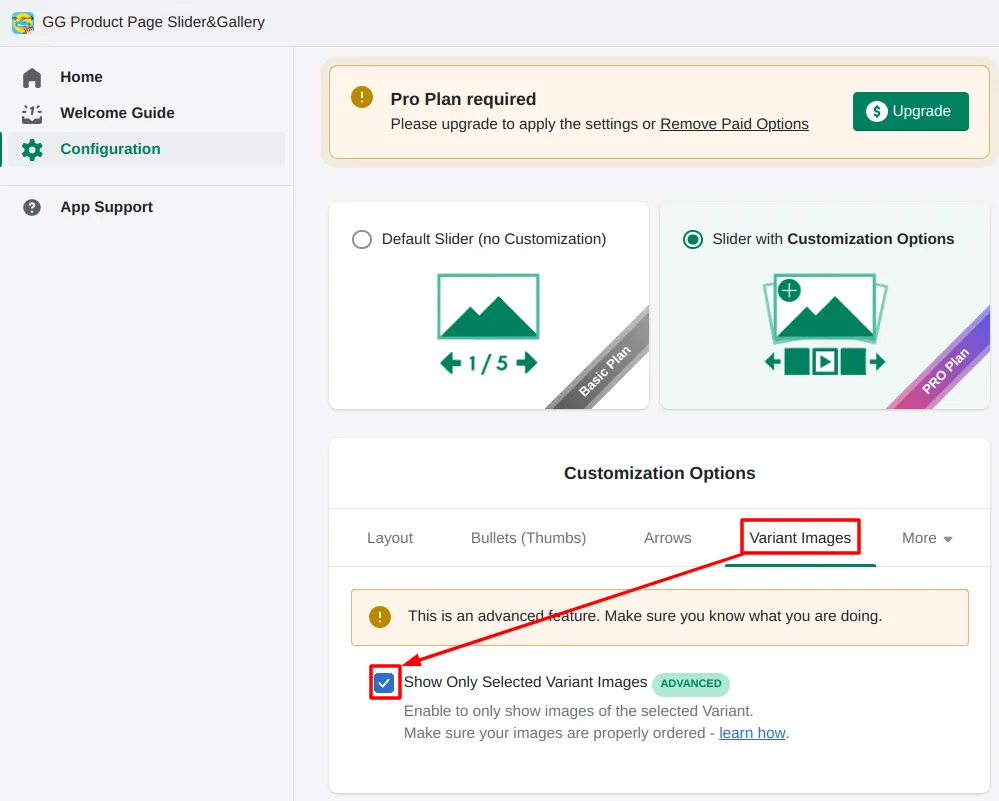
Step 3: Enable the App’s option
In the App’s Configuration page go to “Extra Features” Tab. Check the “Show only Selected Variant Images” and click “Apply Changes”:
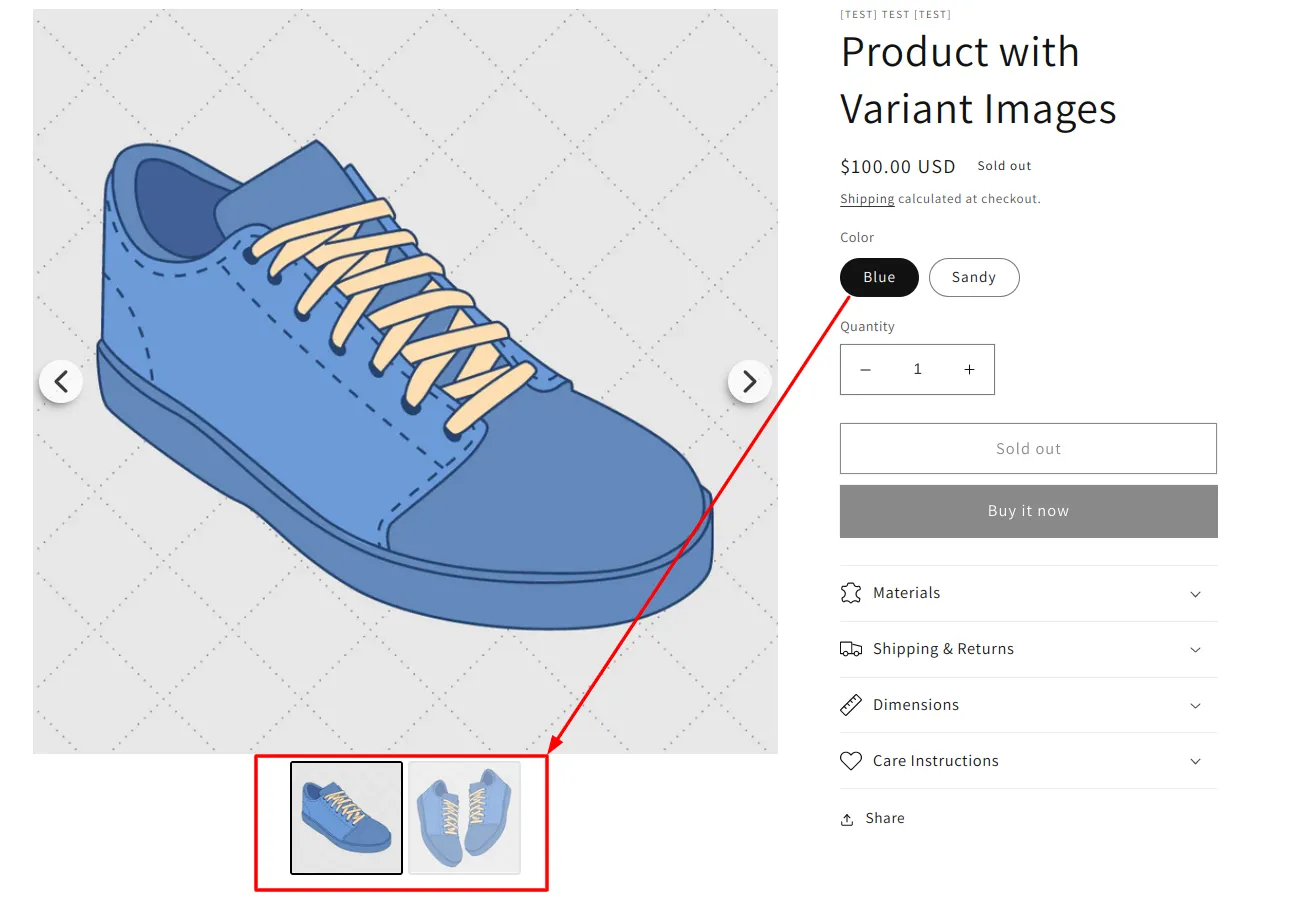
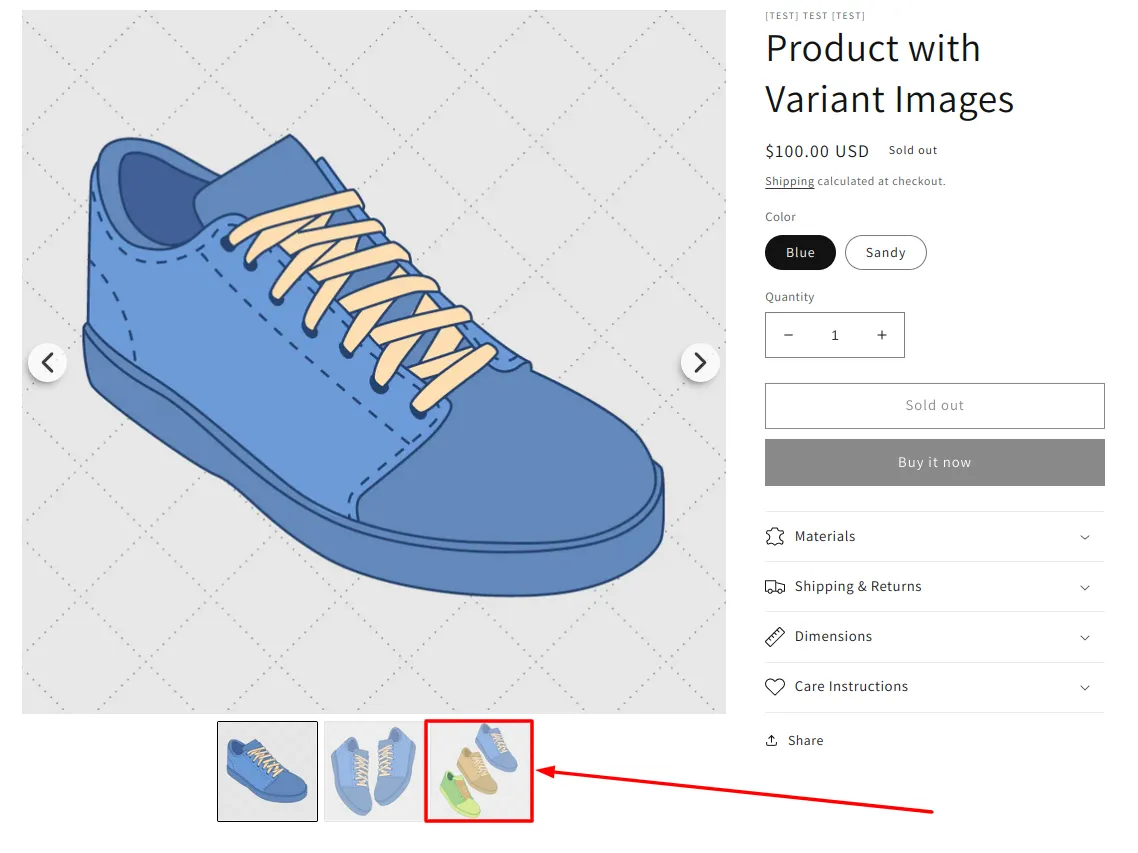
Step 4: Open your store and check the result
If you followed all the steps you should see the effect live on your store. Whenever you select a variant of your product, only relevant variant images will be displayed. For the denim color, you should only see the three images of the denim color variant. The multicolor variant will exhibit similar behavior.
If you notice any issue — feel free to contact our support team.
Extra 1: Can I add Video slides?
Yes, you can add Videos just as Images. Videos will be assigned to Variants following the same convention described above. The only limitation is that a Video cannot be selected as the Featured Image so you should put a Video after the Featured Image.
Extra 2: Show some Images for all Variants
You can have some Images “Common” for all Variants without the need to duplicate them. For this just put the “Common” Images at the very beginning before the very first Variant:
These “Common” Images will be appended at the end for each Variant:
Following this rule you can have as many “Common” Images and Video as needed.