Manual Installation - Shopify Product Page Slider
If the automatic installation didn’t work for your theme, you can manually tell the slider where to render by adding a CSS class to your theme’s Liquid code. This guide walks through the process using the Dawn theme as an example, but the same approach works for any Shopify theme.
In this guide we will show how to install the app on any custom theme. As an example we will take the popular Dawn theme.
1. Back-up your theme
By following this guide you accept the risk of damaging your theme code. Make sure to have a copy of your theme before changing the code.
2. Activate the App Embed
Just make sure it’s activated: App Embed Activation
3. Find the gallery container
Lets find the container of your original gallery. It usually includes all images and videos of the product:

What we need is the class or id attribute of the parent container.
Right click on the original gallery and “Inspect” it

Find the container
In the code inspection tab try to find the div container that highlights the whole gallery (including all images)
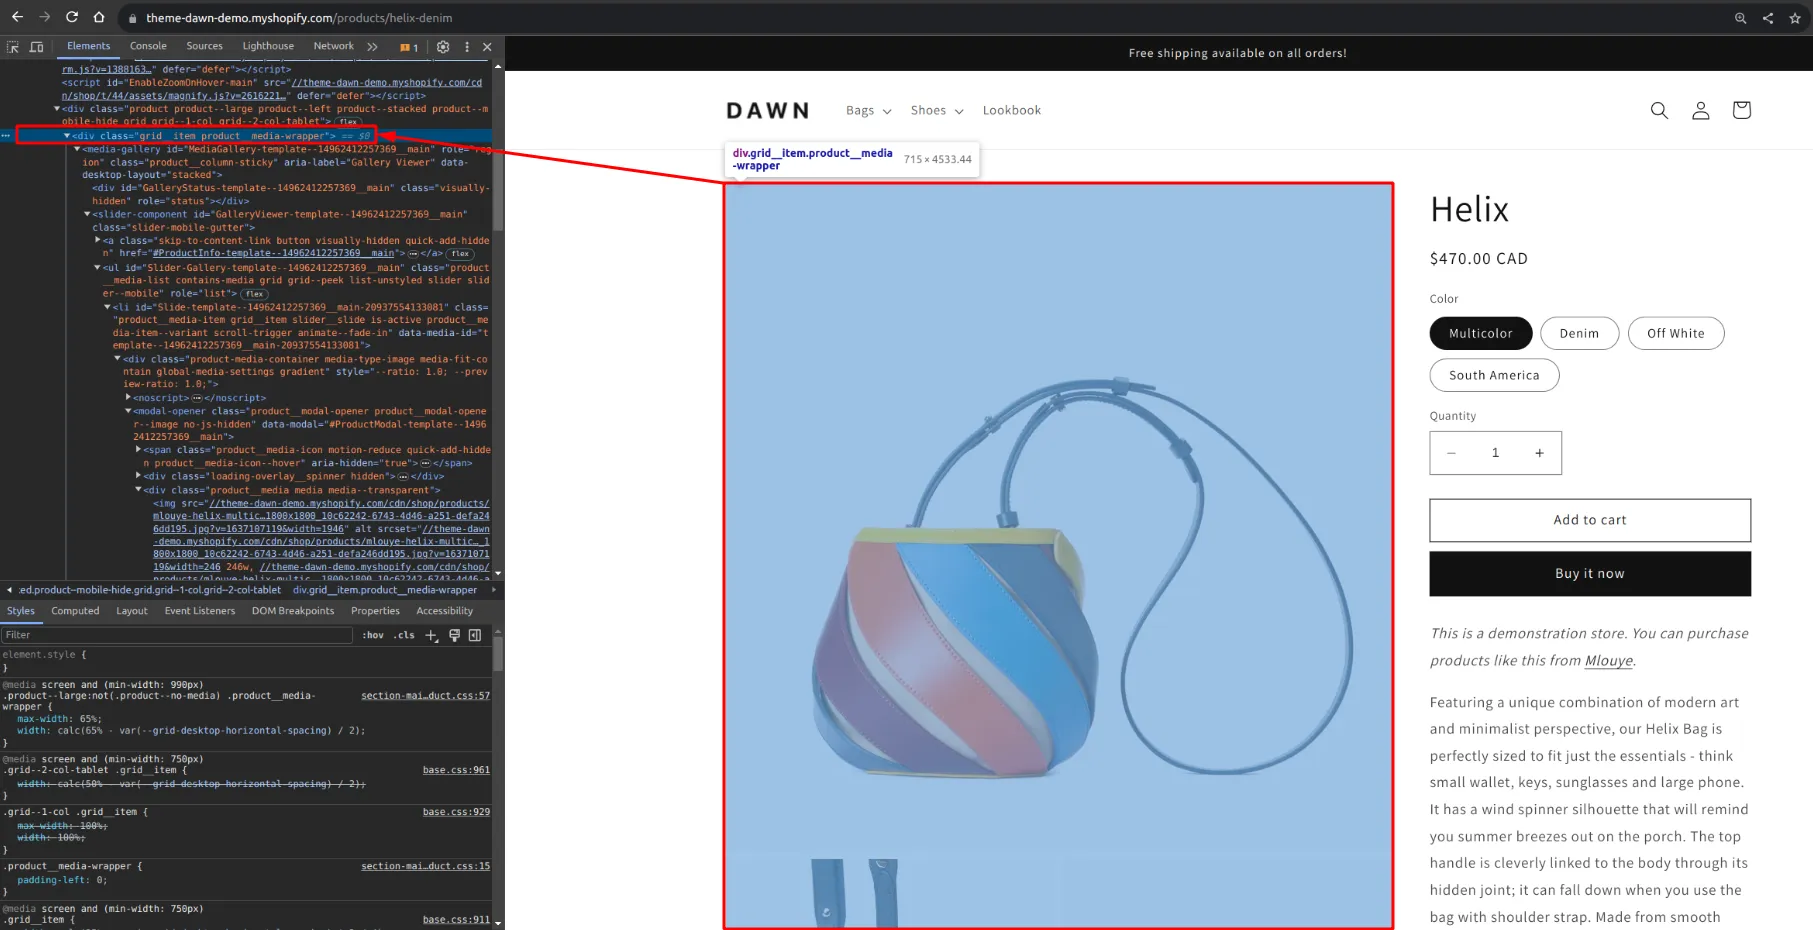
Remember the class or id attribute
In the example above the container has a class="grid__item product__media-wrapper" attribute. Remember it for the next step. It might also be an id or any other sign that will help you to find the section in the code editor.
4. Update the theme code
Lets edit the theme code to “explain” our script where the gallery should appear.
You need to open the theme code and find the liquid file that contains the section you identified in the previous step.
Once you found the code section — add a class="pmslider-manual-install" to it (see screenshot below).
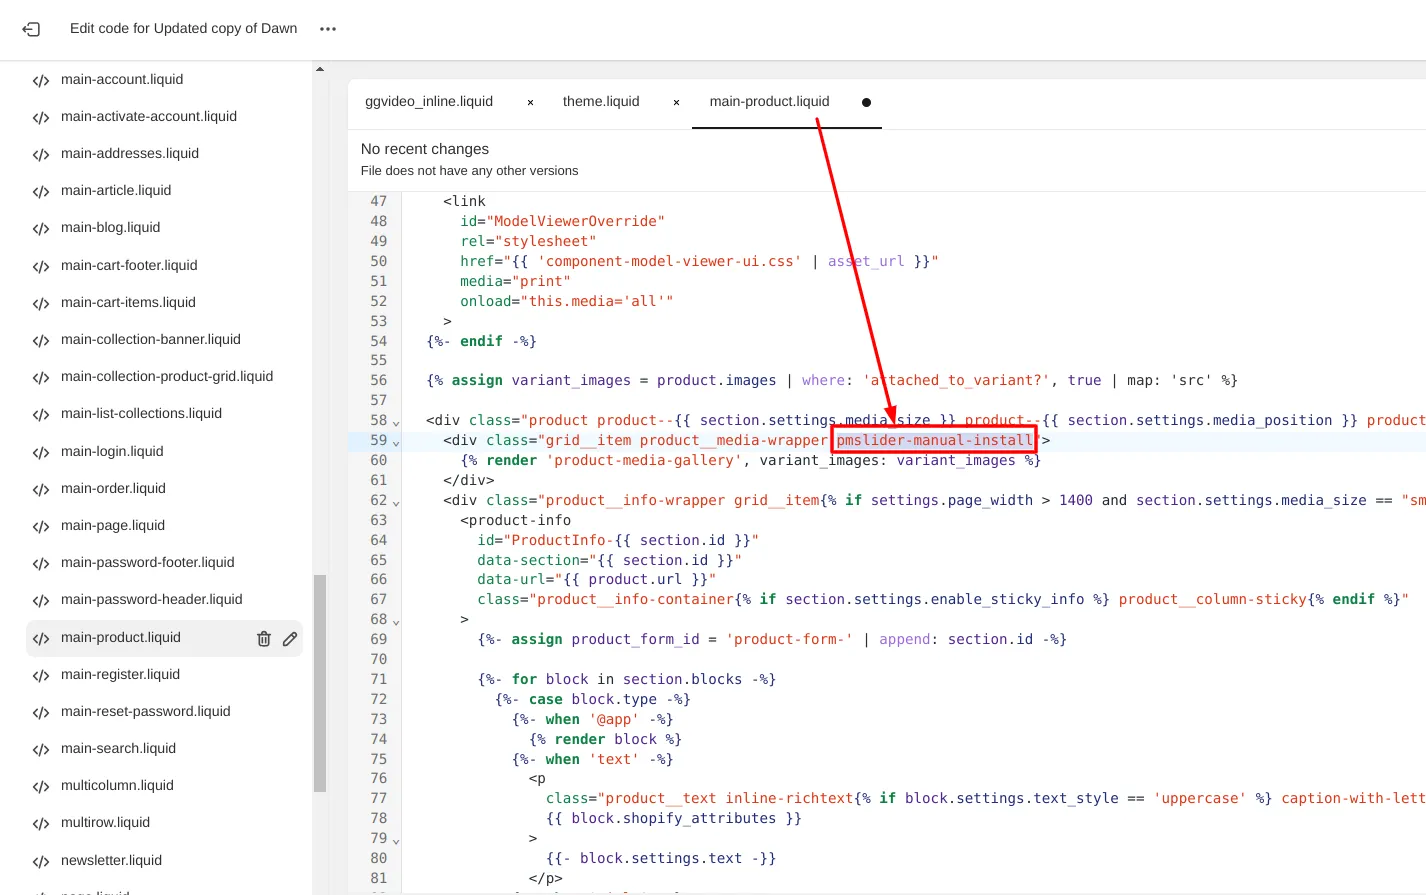
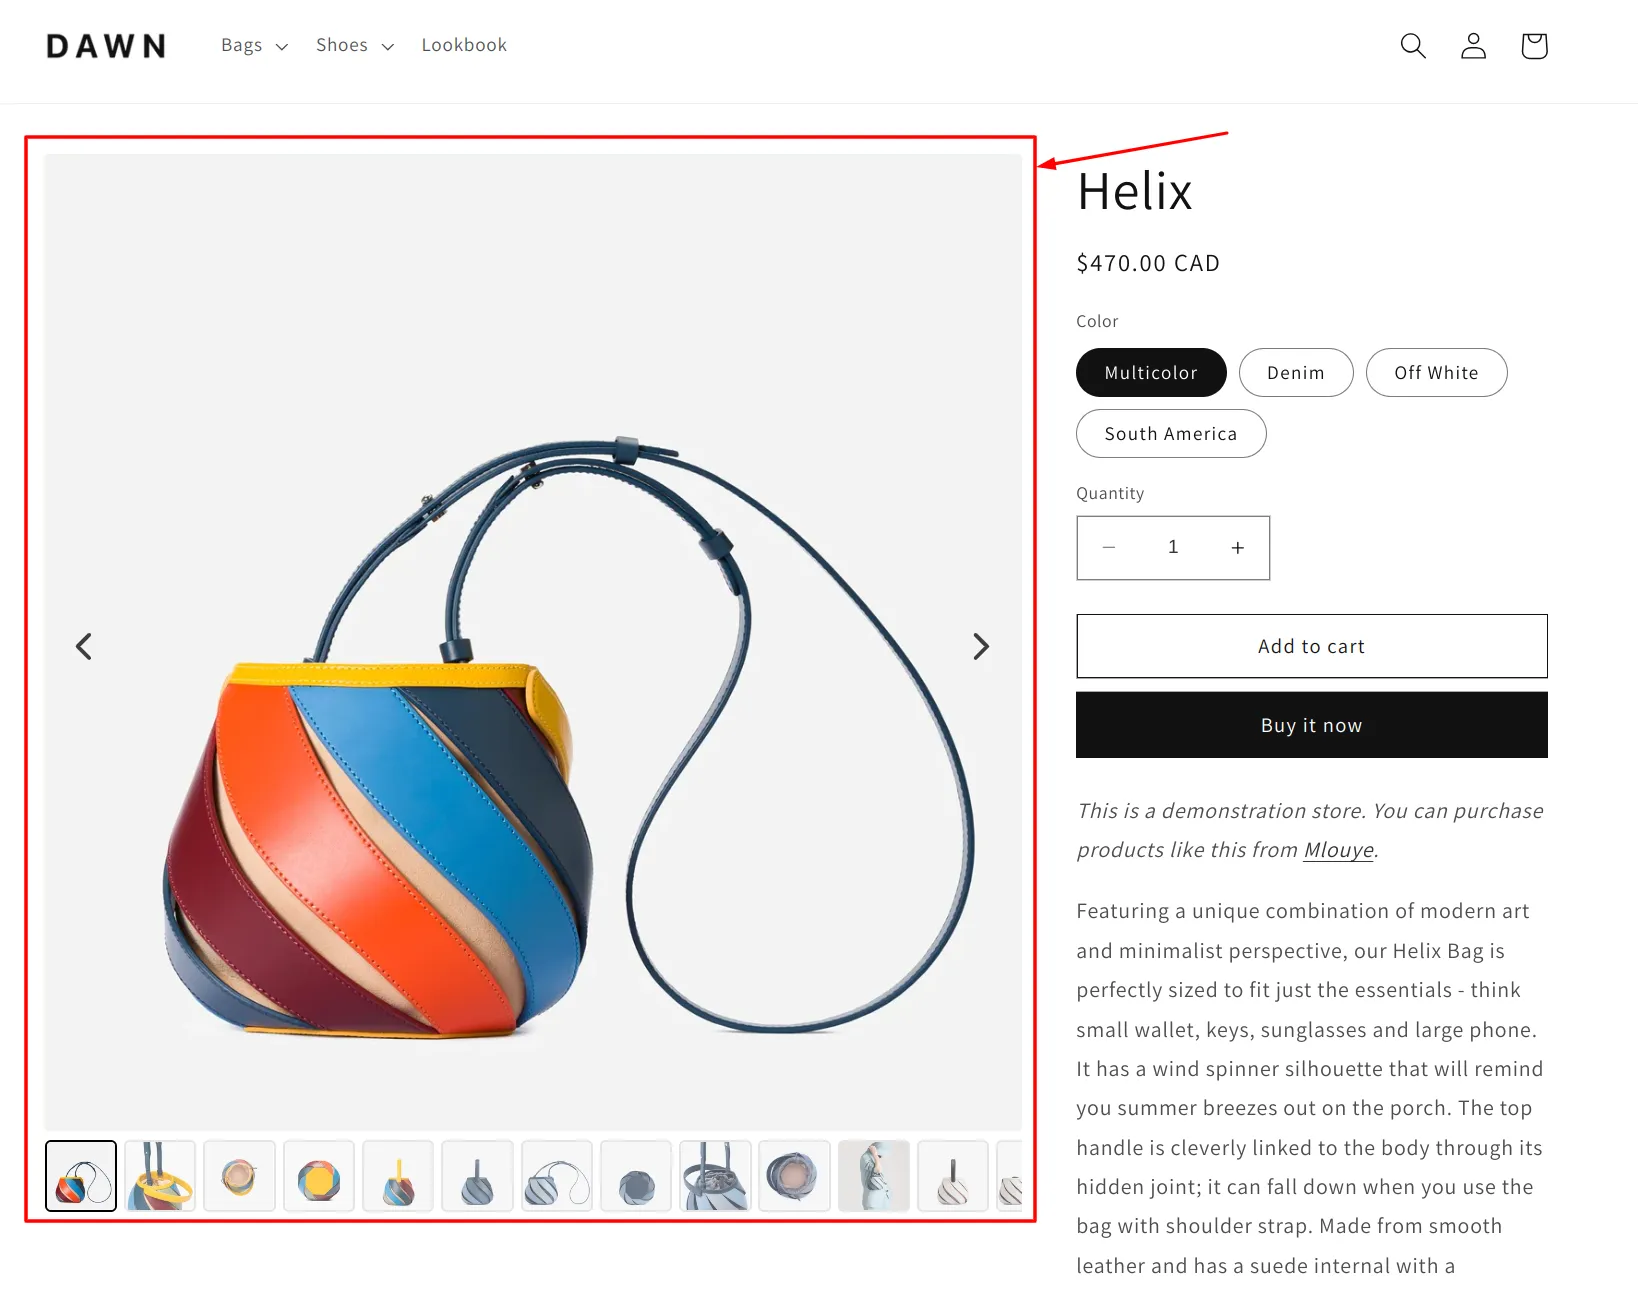
After you save the changes — try to reload the product page. If the app is enabled — you should see the effect:
Once your slider is working, you can also show only selected variant images or customize the gallery look with CSS.